


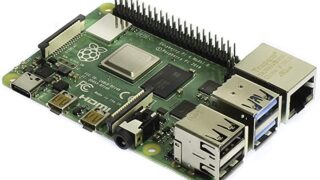


Raspberry pi
使用したUSB FAX Modem
PLANEX USB 56K アナログ回線対応 FAX/DATAモデム PL-US56K
モデムが認識しているか
# lsusb
これでplanexがあればOK
ドライバの起動
# modprobe usbserial vendor=0x2019 product=0xab27
確認
# ls -la /dev/tty*
ttyUSB0があればOK
ドライバの自動起動
# vi /etc/rc.local
modprobe usbserial vendor=0x2019 product=0xab27
hylafax serverのインストール
# apt-get install hylafax-server
hylafaxのセットアップ
# faxsetup
:
Update /var/spool/hylafax/status/any.info.
HylaFAX configuration parameters are: HylaFAX 構成パラメーターは次のとおりです。
[1] Init script starts faxq: yes スクリプト開始時に faxq を初期化
[2] Init script starts hfaxd yes スクリプト開始時に hfaxd を初期化
[3] Start paging protocol: no ページングプロトコルを開始
Are these ok [yes]? これでいいですか。
Modem support functions written to /var/spool/hylafax/etc/setup.modem.
Configuration parameters written to /var/spool/hylafax/etc/setup.cache.
Restarting HylaFAX server processes.
You have a HylaFAX scheduler process running. faxq will be
restarted shortly, as soon as some other work has been completed.
Can I terminate this faxq process (10849) [yes]?
HylaFAX スケジューラ プロセスの実行があります。 faxq は、いくつかの他の作業が完了するとすぐに、まもなく再起動されます。 この faxq プロセス (10849) を終了することができます。
Should I restart the HylaFAX server processes [yes]?
HylaFAX サーバー プロセスを再起動する必要がありますか。
/etc/init.d/hylafax start
Not starting HylaFAX daemons since they are already running.
You do not appear to have any modems configured for use. Modems are
configured for use with HylaFAX with the faxaddmodem(8) command.
使用するために構成されたモデムを持っている場合は表示されません。
Faxaddmodem(8) コマンドで HylaFAX で使用するモデムを構成します。
Do you want to run faxaddmodem to configure a modem [yes]?
モデムを構成する faxaddmodem を実行しますか。
Serial port that modem is connected to [ttyS0]? ttyUSB0
どのモデムのシリアル ポートに接続しますか。(前回得たUSBモデムのデバイス名を入力)
Ok, time to setup a configuration file for the modem. The manual
page config(5) may be useful during this process. Also be aware
that at any time you can safely interrupt this procedure.
それでは、モデムの構成ファイルを設定します。 マニュアル ページ config(5) は、この過程で役に立つかもしれません。 また、いつでもこの手順を安全に中断できます。
Reading scheduler config file /var/spool/hylafax/etc/config.
No existing configuration, let’s do this from scratch.
既存の構成が見つかりません。最初からこれをやってみましょう。
Country code [1]? 81 国コード
Area code [415]? 78 市外局番(先頭ゼロなしで神戸078なら78)
Phone number of fax modem [+1.999.555.1212]? +81.78.925.xxxx FAX番号
Local identification string (for TSI/CIG) [“NothingSetup”]? “TAKAHIKO FUJIMOTO”
Long distance dialing prefix [1]? 0 市外局番先頭番号
International dialing prefix [011]? 010 国際電話先頭番号
– 以下全てデフォルトのままエンターキーで進む –
The non-default server configuration parameters are:
デフォルト以外のサーバー構成パラメーターは次のとおりです。
CountryCode: 81
AreaCode: 78
FAXNumber: +81.78.925.xxxx
LongDistancePrefix: 0
InternationalPrefix: 010
DialStringRules: etc/dialrules
SessionTracing: 11
RingsBeforeAnswer: 1
SpeakerVolume: off
GettyArgs: “-h %l dx_%s”
LocalIdentifier: HOGEHOGE
TagLineFont: etc/lutRS18.pcf
TagLineFormat: “From %%l|%c|Page %%P of %%T”
MaxRecvPages: 25
Are these ok [yes]? これでいいですか。
Now we are going to probe the tty port to figure out the type
of modem that is attached. This takes a few seconds, so be patient.
Note that if you do not have the modem cabled to the port, or the
modem is turned off, this may hang (just go and cable up the modem
or turn it on, or whatever).
今我々 はプローブの tty ポートに接続されているモデムの種類を把握しています。 これはほんの数秒かかるので我慢してください。モデムにケーブルが接続されているか、電源が切れていないか注意して下さい。ハングアップの原因になります。 (そうならケーブル繋いで電源点けに行け…という意味かな)。
Probing for best speed to talk to modem: 38400 OK.
About fax classes:
The difference between fax classes has to do with how HylaFAX interacts
with the modem and the fax protocol features that are used when sending
or receiving faxes. One class isn’t inherently better than another;
however, one probably will suit a user’s needs better than others.
Fax クラスの違いは、HylaFAX がモデムと fax を送受信するときに使用する fax プロトコルの機能とやり取りする方法に関係しています。 1つのクラスは、もう一つより本質的によくありません;しかし、一つは他よりよく、ユーザーのニーズを多分満たすでしょう。
Class 1 relies on HylaFAX to perform the bulk of the fax protocol.
クラス1は、HylaFAXが大半のファックス・プロトコルを実行することをあてにします。
Class 2 relies on the modem to perform the bulk of the fax protocol.
クラス2は、大半のファックス・プロトコルを実行するために、モデムに頼ります。
Class 2.0 is similar to Class 2 but may include more features.
クラス2.0はクラス2と類似しているが、より多くの特徴を含むかもしれません。
Class 1.0 is similar to Class 1 but may add V.34-fax capability.
クラス1.0はクラス1と類似しているが、V.34-ファックス能力を加えるかもしれません。
Class 2.1 is similar to Class 2.0 but adds V.34-fax capability.
クラス2.1はクラス2.0と類似しているが、V.34-ファックス能力を加えます。
HylaFAX generally will have more features when using Class 1/1.0 than
when using most modems’ Class 2 or Class 2.0 implementations. Generally
any problems encountered in Class 1/1.0 can be resolved by modifications
to HylaFAX, but usually any problems encountered in Class 2/2.0/2.1 will
require the modem manufacturer to resolve it.
HylaFAX をクラス1/1.0で使うとき、大部分のクラス2またはクラス2.0でモデムを使うよりも、一般に多くの特徴があります。
クラス1/1.0では発生した様々な問題は、通常 HylaFAX によって修正され解決されます。しかしクラス2/2.0/2.1では発生した様々な問題の解決は、通常、モデムに要求します。
Use Class 1 unless you have a good reason not to.
あなたは正当な理由がなければ、クラス 1 を使って下さい。
This modem looks to have support for Class 1.0 and 1. このモデムはクラス 1.0 および 1 のサポートを持つように見えます。
How should it be configured [1.0]? どのように構成されるべきか。(とりあえずデフォルトのまま1.0で)
Hmm, this looks like a Class 1.0 modem.
Product code (ATI0) is “56000”.
Other information (ATI3) is “CX93001-EIS_V0.2002-V92”.
うーん、これはクラス 1.0 モデムのように見えます。 製品コード (ATI0) は、「56000」です。 その他の情報 (ATI3) は、「CX93001-EIS_V0.2002-V92」です。
DTE-DCE flow control scheme [default]? DTE DCE フロー制御方式(デフォルト)
Modem manufacturer is “Rockwell/Conexant”.
Modem model is “AC/K56”.
モデム・メーカーは、「ロックウェル/Conexant」です。
モデム・モデルは、「AC/K56」です。
Using prototype configuration file conexant-1.0…
プロトタイプコンフィグ conexant-1.0 を使います…
The modem configuration parameters are:
モデム構成パラメータは以下の通りです:
ModemFlowControl: rtscts
ModemHardFlowCmd: AT&K3
ModemNoFlowCmd: AT&K0
ModemRate: 19200
ModemSetupDCDCmd: AT&C1
ModemSetupDTRCmd: AT&D2
ModemSoftFlowCmd: AT&K4
Are these ok [yes]? これでいいですか。
Creating new configuration file /var/spool/hylafax/etc/config.ttyACM0…
Creating fifo /var/spool/hylafax/FIFO.ttyACM0 for faxgetty… done.
Done setting up the modem configuration.
コンフィグとFIFOファイルを作りましたよ。モデム設定準備が整いました。
Checking /var/spool/hylafax/etc/config for consistency…
…some parameters are different.
一貫性のためのチェック…若干のパラメータが異なります
The non-default scheduler parameters are:
デフォルト以外の スケジューラ・パラメータは、以下の通りです:
CountryCode: 81
AreaCode: 78
LongDistancePrefix: 0
InternationalPrefix: 010
DialStringRules: etc/dialrules
Are these ok [yes]? これでいいですか。
Creating new configuration file /var/spool/hylafax/etc/config…
…saving current file as /var/spool/hylafax/etc/config.sav.
新しいコンフィグを作成して、現在のコンフィグを保存しました。
Don’t forget to restart hylafax in order to run faxgetty on this new modem
line.
/var/spool/hylafax/config
Hylafax でこの新しいモデムラインを実行するために再起動することを忘れないでください。
Do you want to run faxaddmodem to configure another modem [yes]? n 別のモデムを構成する faxaddmodem を実行しますか。
You do not appear to be using faxgetty to notify the HylaFAX scheduler
about new modems and/or their status. This means that you must use the
faxmodem program to inform the new faxq process about the modems you
want to have scheduled by HylaFAX. Beware that if you have modems that
require non-default capabilities specified to faxmodem then you should
read faxmodem(8) manual page and do this work yourself (since this
script is not intelligent enough to automatically figure out the modem
capabilities and supply the appropriate arguments).
あなたは、新しいモデムやそれらの状態についてHylaFAXスケジューラに通知するためのfaxgettyを使っているように見えません。
これは、あなたがHylaFAXによってスケジュールされた新しいfaxqをモデムへ知らせるFAXモデムプログラムを使わなければならないことを意味します。
あなたがFAXモデムに指定される非デフォルト能力を必要とするモデムを持っているならば、あなたがマニュアルのfaxmodem(8)ページを読まなければならなくて、自分自身でこの仕事にしなければならないように注意してください。
Should I run faxmodem for each configured modem [yes]?
構成されたモデムごとにfaxmodemを走らせますか。
/usr/sbin/faxmodem ttyUSB0
Done verifying system setup. システム設定の確認を完了。
/var/spool/hylafax
一旦、rebootする
デフォルト用紙サイズの確認
# vi /etc/hylafax/pagesizes
default A4 9921 14031 9255 13207 472 345
サーバーのテスト
# faxstat -a -s
ファックスユーザー兼アドミンを登録
# faxadduser -a アドミンパスワード -p ユーザパスワード ckenko25
ただのユーザ登録
# faxadduser -p ユーザパスワード ユーザーネーム
ユーザー削除
# faxdeluser ユーザネーム
ユーザ一覧表示
# cat /var/spool/hylafax/etc/hosts.hfaxd
送信の確認
# sendfax -n -d 078925**** /etc/hosts
これで送信に成功すれば完成
着信しないようにする(着信はasteriskに任す)
# vi /etc/hylafax/config.ttyUSB0
RingsBeforeAnswer: 0 ← 1 を 0 に変更すると着信時に応答しない。
送信元日時の文字化け対策
これでdefault locale を英語に変更する
# raspi-config
HylaFax 再起動
# /etc/init.d/hylafax restart
クライアント(ubuntu/debian)はYajHFCを使う
# vi /etc/apt/sources.list
deb http://download.yajhfc.de/repository/apt/ stable/
# wget -q https://www.yajhfc.de/JonasWolz.pub -O - | sudo apt-key add -
# apt-get update
# apt-get install yajhfc-faxprinter
windows版は ここにある
YajHFCの設定
Host name: 192.168.1.9
Username: ckenko25
Passsword:*******
以上でファイル名を選択して
電話番号を指定してSendタブで送信できる
libreofficeなどのアプリケーションからFAX送信
印刷指定でプリンターをyajhfcを選択すると電話番号を聞いてくる
参考サイト


コメント